Before and After

Statements

Years ago I worked at a clothing store with a distinctive style that I adopted thoroughly as my personal style, and I continued to shop there exclusively for nearly a decade. I also during this time adopted navy as my signature color. I kept repeating that navy was a neutral while black was a statement. I repeated this to myself, since no one ever asked me why I wore so much navy. (I guess it’s a good thing I was not in fact trying to make a statement.) I have recently abandoned navy entirely, however, in favor of black. Black shoes, black jacket, black jeans, black nails. This shift seems to have occurred at about the same time I started working from home, so if I am in fact making a statement with my clothes, I am still the only one around to listen. But I digress. I meant to tell you about my favorite navy cardigan.

I bought my cashmere navy cardigan when I still worked at the clothing store, which is just about the only time I’ve ever bought cashmere. I was dismayed to find it full of holes the last time I inspected it (i.e., when I purged my closet of all navyness). It was pretty old, and given my recent abhorrence of navy, hadn’t been worn in some time. Nevertheless, I couldn’t bear to part with it and kept it in case I found a use for it.

One day an online luxury goods company sent me a marketing email featuring a cashmere travel pillow that cost roughly a mint. I wanted the pillow despite knowing how dumb that was–and then I knew.

Upon close inspection, I determined that the holes in my sweater were all up by the shoulder, leaving me the back and both sides to work with. I decided this was perfect, since I could use the buttons to close the pillow case.

image

Pick-pocket pup

image

Before

Long story short, I cut the top off, slapped a seam in the top and the bottom, and stitched a third right down the side of the left pocket just where it would fit the pillow form. And there you go. Cashmere travel pillow.

At first I didn’t really like the color or the buttons or the pocket. But then I realized I could put a nip in the pocket and decided that it fits the new me just fine. So now I’m flying the solo skies, content in the fact that my super luxurious cashmere travel speaks volumes about me, if only just to me. Like my statement-making black jacket and nails and understated jewelry (because statement necklaces went out with the neutral navy, natch).

image

Naps and nips

Repurposing Pinvy

I’ve been spending a pinch more time on Pinterest these days. While I’m looking for inspiration, what I develop most of the time is image envy. Let’s call it Pinvy. Sometime my Pinvy is based on the object in the image, and sometimes (most of the time) it’s based on the composition and lighting in the photograph itself (because while I can craft a lot of crap, I can’t seem to capture my craftiness in an image that satisfies). One such envy-inducing image was a wavy, scalloped-looking planter for succulents. It made me think of a weird bowl made out of a melted record that I had sitting in a closet, and then the Pinvy turned into Pinspiration. Which is to say, I felt that I had the adequate skills and materials to copy something I saw.

I pulled this wacky record bowl out of the closet and rejoiced with the realization that it would make the perfect planter. Have you ever noticed that inexpensive planters never have a hole in them? And that trying to repurpose other things into planters is nearly impossible because they lack that drainage hole? That hole, that tiny absence of material is mysteriously worth extra money except for this one time I remembered I owned a melted record that could be used like a bowl.

So.

Step 1: Paint the record with leftover paint.

Step 2. Fill with dirt.

Step 3. Put succulents in dirt.

Step 4. Photograph (poorly).

Step 5. Photograph again (still poorly).

Step 6. Give up and post it anyway.

Weird record bowl

Weird record bowl

Repurposed planter

Repurposed planter

New Old Bed

Once the bedframe is bare, I start obsessing about paint. I even buy a third can of spray paint at Home Depot and stack it with the others. The third one is matte, as I decided I didn’t want to go metallic about ten minutes after buying the metallic colors. I also worry about how hard it’s going to be to spray paint the very narrow pieces of metal, and whether I’ll lay the bed on the ground to do this or put it together and paint it while it’s assembled. I go back and forth between brown and gray and matte and satin and spray and brush so many times that I start to lose my momentum and completely freak out.

I realize at this point that this project is unlike any I’ve ever done. It isn’t fail-safe. Not in the “cannot fail” sense, but in the “harmless fail” sense. Up to now, anything I’ve screwed up is either funny or fixable. But I’ve put so much time into this project, not just stripping it, but waiting for nearly ten years to do it, that failing now might break my heart.

I remind myself of a few things to get past this paralysis. First, nothing’s ever really not fail-safe. If I don’t like the color I choose, I can strip it again. Or, make like my lazy predecessors and paint over it. It won’t be the end of the world, no matter what happens. Second, if I take my time, choose carefully, don’t skip any steps, and basically pretend I’m a patient, careful, thorough individual, I could possibly get it right the first time. Third, call Dad for help on that second part.

I call my Dad, and he offers some advice. “I’d do it with a brush, even maybe an artist’s brush for the little parts. And first do one of the slats that no one will see. Take it in the house and make sure you like it in that light.”

I finally buy a can of actual metal paint in the darkest brown I can find as well as a can of primer and do as Dad says. I smear some brown paint on one of the slats, let it dry and take it in the house. It’s awful. I decide I won’t do brown. I consider this decision a major achievement. When I realize that this brings me back to gray, my original choice, I start to wonder. Should I have just gone with the chalk paint?

I only have to turn my head to see the graphite Annie Sloan chalk paint I used on my dresser and realize that that’s exactly what I want on my bedframe. I have no idea why I drove to Agoura Hills a month ago, looked at the sample in the store, and talked myself out of buying this paint. I had a sample right here. In the room where the bed would go. I want to slap myself. At the same, time, all the hemming and hawing and doubt has gotten me here, and I now know exactly what I want. So that’s something.

All this hemming and hawing and doubt has not returned me to Agoura Hills, however, which is stupidly far away. And also, that stuff is expensive. There must be an alternative.

I spend hours online looking at paint. There are all kinds of cheaper brands of chalk paint that you can buy at Home Depot—theoretically—but none of the local stores have them available. You have to order this stuff online and wait a week. Waiting is not in my skill set. Because waiting is not in my skill set, I don’t want to order a sample, wait a week, test it, decide I like it, order the rest, and wait another week. Millions of dollars are not in my bank account. Because my bank account lacks millions of dollars, I do not want to order a bunch of paint only to discover that I hate it. So.

I come to the decision late Sunday afternoon that I need to just suck it up and do the Annie Sloan. I know I’m going to like it, I know exactly how it will go on, how it will dry, what the wax will do to it. And I know I’ll like it. If this project is so important that it’s got to be right, it’s worth the $40 quart and hour’s drive (one way, ugh). Like really? It’s that far away to get this very popular paint? Really?

It occurs to me that it’s completely insane that the only place in Los Angeles county that sells a very popular craft paint (so popular that huge national home-improvement retailers are copying it) is only barely in LA county. It’s too bizarre. So I check Annie Sloan’s site. And since I did my dresser two years ago, a store in Atwater Village has started stocking it. Atwater Village is ten minutes away. Also this store closes in twelve minutes.

I tear over to Atwater Village and actually block someone’s driveway when I can’t find a legal parking spot, sprint to the store, and just barely get there before they close. I don’t get there, however, before the customer ahead of me buys the entire stock of Annie Sloan chalk paint in graphite. FIY is starting to feel like FML. But at least they’ll have more by Tuesday.

I decide to prime the bed in the intervening two days, even though this chalk paint isn’t supposed to need it. I do this because I don’t trust the company’s website, one, and two, because I want to do something while I wait, and three, because it’s supposed to rain before Tuesday. The primer will protect it, right? Sure.

It doesn’t rain, and the paint comes in on Tuesday. But rain is still in the forecast, so I don’t lose any time. I paint that sucker every spare second I have, even though the gray paint is almost the color of the clouds above us. But I don’t rush. I successfully pretend to be that patient, careful, thorough individual and let each coat dry completely. Then, I do the dark wax (I skip the clear wax because I’m completely sure I want the dark wax to be very opaque). I buff it up and bring that baby in the house on Friday night, just as the rain forecast drops to 0% for the foreseeable future.

On Saturday, it pours. I lie in my new old bed and listen to the rain.

Photo May 16, 9 30 59 AM

DSCF0326

DSCF0328

DSCF0343

DSCF0330

DSCF0331

“I Love Scraping Off Paint!” Said No One, Ever

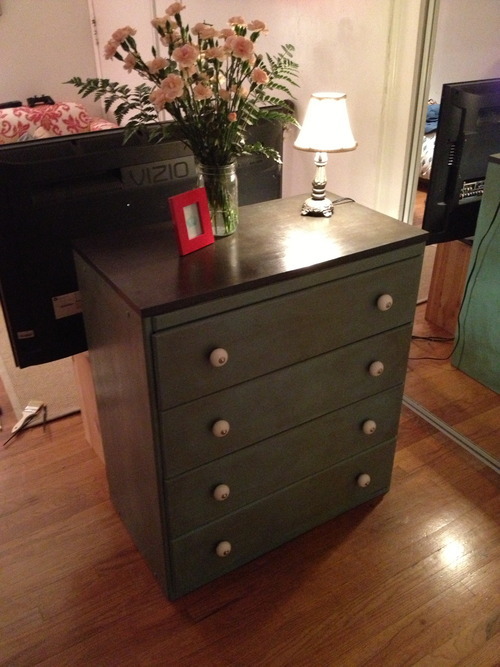
The first (only?) piece of antique furniture I ever bought, and probably the only piece that is actually worth anything, I more or less bought by accident the year I moved to Austin. This was well before Fail It Yourself, and in fact well before I’d ever even used a staple gun. Basically, I have no idea who the woman was who bought this piece of furniture. She may have even believed she liked knitting. She was a very strange creature. Nevertheless, this woman was me, since I still own this item.

I was looking around Craigslist for a used mattress (grad students can’t be choosy, don’t judge) and found one for $200 that happened to come with an antique metal bed frame. That seemed pretty lucky, so I bought it. I slept on bed and mattress for two years, then needed to dispatch both so I could move to Los Angeles with my entire life packed into the trunk of a Korean subcompact.

But my mother wisely stopped me from selling the bed frame, saying she’d keep it in San Antonio. She thought I might one day want to refinish it. In January this year, I looked over my photographs from the past few years. It seemed clear that, since all my photographs were of the dog or literal, actual peeling paint, I should either get some new hobbies or think about refinishing the bed. I asked my parents how I might go about shipping that bed to myself with as little inconvenience or expense to them as possible and started researching costs and means. I asked for the bed’s measurements, and this is what I got in reply.

Mom's text caption: "El iron bed"

Mom’s text caption: “El iron bed”

My parents, paragons of inexhaustible generosity and energy, were ready for a road trip. Two weeks later, my bedframe was deposited into my apartment. My dad, after seeing how much paint was in the back of his car, exclaimed that just a little stripper would clean that baby right up.

Peeling

Peeling

What's under all that gunk, I wonder?

What’s under all that gunk, I wonder?

I must have had some premonition that this was going to be tougher than he thought, because I didn’t touch the thing for almost two months. But in late March, I determined that the time was right. I had a whole weekend clear to work on it, and figured that I’d get it stripped on Saturday, then painted on Sunday.

While I have no idea what I’m doing most of the time, you would think that I’d have peeled and applied enough paint by now to know that failing it myself rarely goes according to plan. Nevertheless, I was shocked, shocked that this project took five weekends to complete.

And here’s the tale of fail.

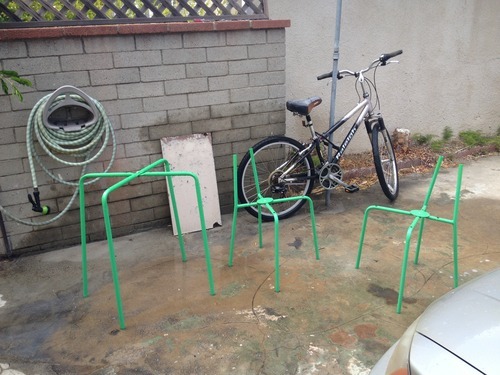
First, the prep work. After pinning lots of photos of other peoples’ stuff that I want my stuff to look like, I determine that I want to go with a dark color when I paint this thing. I’m thinking maybe very dark gray, or very dark brown, and I think maybe I want to do some chalk paint and wax action. So I head to Agoura Hills to look at the chalk paint. I decide that the gray is too light and bluish, even with the dark wax, and I don’t like the brown at all. And anyway, all the googling I’m doing about painting metal says to go with spray paint.

So I gather my materials at Home Depot and pick up a couple cans of metallic spray paint that I intend to test out. Then I head home and get to work.

First, I use the stripper I already have. If paint stripper could be organic, this stuff would be organic. It’s orange, low-odor, non-caustic, indoor-safe, and absolutely hopeless on whatever kryptonite-based paint is on this bed frame. I spend a day scraping away with this stuff, and my hand aches and my shoulder throbs, and I’ve taken off maybe six square inches of ancient, fossilized, sedimentary paint.

I go back to Home Depot and get the poisonous, noxious, chemical-based, burn-your-face-off paint stripper and try that. It’s a bit better, but whatever time I gain in paint-peeling efficiency I lose to skin-peeling prevention every time I run to the garden hose to rinse away the tiny drop that’s melting off my flesh. And yes, I’m wearing chemical-proof rubber gloves.

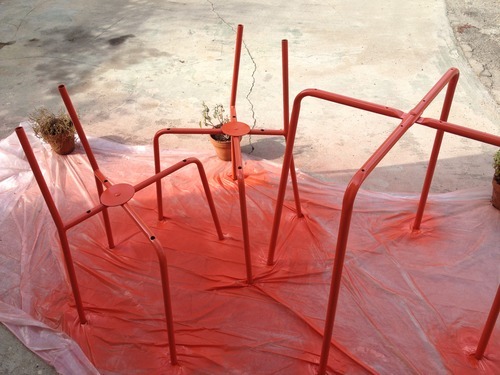
The biggest mystery about this whole thing is trying to understand why I should have to peel off someone else’s hideous mistakes. The layers of paint on this frame numbered no less than five (in some parts more) and included white, pink, metallic silver, metallic gold (on the decorative details), dark green, and aqua blue, in that order (top layer to bottom one). And where are the bozos who chose these colors now? And why isn’t this their problem?

Over and over I asked myself why none of this bed’s previous owners bothered to strip it before painting it. Finally, I scraped my way down to the answer: Scraping paint is a miserable chore that no one anywhere ever wants to do.

I mean, who paints a bed frame this color?

I mean, who paints a bed frame this color?

So why do I do it? I guess because I’ve thought about making this bed look as nice as it should for nearly a decade and can’t bear to let that dream die. And, I suppose, because I know I won’t be happy unless I do this one project right.

Also, I want to know what those decorative bits look like without the paint, and I am rewarded for my work when I discover that they are brass and pretty much as awesome as I could have imagined.

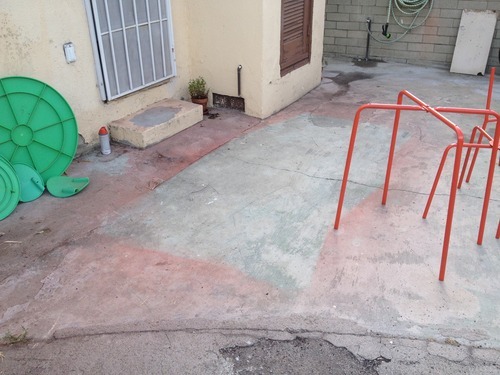
So, after four weekends of scraping and a couple of chemical burns, I get all the paint off this thing while listening to Nick Offerman’s Paddle Your Own Canoe, Neal Stephenson’s Snow Crash, Thomas Hardy’s Far From the Madding Crowd, and Zac Bissonette’s The Great Beanie Baby Bubble. (Not all of them in their entirety, silly; I did other things during these weeks that included book-listening. This project felt fifty hours long, but it wasn’t) I also think there was some of Stephen King’s Dark Tower series in there somewhere, but I can’t be sure. It’s all kind of a fume-induced blur.

The bare bedframe.

The bare bedframe.

I was thrilled when it was done—but then I realized that the hard part was still to come. I had decisions to make, and nothing increases my ability to fail it myself quite like a decision.

Way Before and Way After

I have a list of completed projects to write about. Per usual, I have been very busy failing at things and even more busy failing at writing about things. When it comes to writing, the biggest fail of all is not writing. In some ways, it’s the only fail. Turns out the exact same thing is true about photography. I might be a crap photographer, but I’m never so good as when I actually remember to take pictures.

This list of things I have to write about includes a campaign desk that I bought on craigslist—wait, I’m searching my email—nearly two years ago! What? Yeah, that for sure says July 2013 on it. And if I look really hard, I can even find a photograph I took when I bought it. I put it on Instagram, in fact.

207

This is a grainy photo that involves power cords. It’s a bad photo. But it is a photo of my desk. So it wins the day. Because there are no other photos of this desk. Not. One.

I didn’t take a photo of the desk after I applied chemical stripper (twice) to remove the sticky brown paint. I didn’t take photos after I tried (and failed) to sand off the remaining stain with my dinky little battery-powered hand sander. I didn’t take a photo of the very serious power sander (not dinky) that my neighbor loaned me. I did order a new backing pad for my neighbor’s power sander when the one on the sander completely deteriorated (because I sanded the hell out of this desk, and, apparently, the sander itself). I can check my Amazon account and see that I bought that backing pad in late July 2014. That’s how I know I did this project in late July. The only way I know. Because I took not a single photograph. Not even an after shot when I was done.

I remember choosing a darker Danish oil for the finish, and I remember using paint stripper and then Brasso to clean the brass pulls and brackets. I also remember that the brackets were a cheaper kind of brass, that they clearly weren’t the original hardware like the pulls, and I remember leaving them off. I can still see the tiny nail marks where those brackets were. They show up pretty prominently because I didn’t fill them before I stained. I don’t remember deciding to do that on purpose. I think I just failed that part. I also don’t remember why I didn’t want to take any pictures. I guess I failed that part, too.

I have dozens of photographs of all the other projects I still need to write about, so I can’t be sure what I was thinking in late July 2014 when I chose not to photograph this project. But I suspect that I was feeling a little blue. I sort of remember maybe breaking it off with some guy in July. And it had been a few months since I worked on Fail It Yourself, and many many months since I worked on it seriously. And I’d been struggling creatively with other projects. And maybe I didn’t take any photographs because I didn’t think my work was worth chronicling. I can’t be sure. It’s also possible I just accidentally erased some photos. I mean, I’m not not prone to error.

But I’m looking around this apartment tonight, and I don’t know if my life is worth chronicling, but I know I’ve worked hard to craft it piece by piece. I want my space to be bright and clean and ruthless. I want everything to be exactly what I mean it to be. But it isn’t. My life and my space aren’t full of clean lines. (How could they be, when I cut so many corners?) But this is my mess. I’m kind of proud of it.

So my before might be way before, and my after might be very after. But this is my desk. I work at it every day.

New_1_DSCF0303

New_1_DSCF0304

Rewriting on the Wall

Originally posted June 14th, 2014

Remember this Fail It Yourself?

image

When I painted this canvas blue, it was the first time I’d ever bought a canvas, brushes, or paint. I’ve bought paint a few more times since, including spray paint, which I swore before buying this canvas that I’d never use again (a vow that I have broken time after time). Once, I bought gray spray paint to refresh a lamp that I bought at Goodwill, and one evening, for no particular reason, I decided to paint this canvas gray with the leftover spray paint. Then I wound some twine around it and stuck some paper leaves on the twine.

image

It looked like this.

I don’t remember when I did this, and I don’t remember how long it stayed. I never really loved it. It eventually came down, and I replaced it with some frames that I spray painted black (with paint left over from this project). At this point, I’m a pro at finding new uses for old paint, and it’s a wonder that I ever buy anything at all. You have no idea how many things in this house are the exact same color blue as my dresser. And when I finally refinish my craigslist-purchased campaign desk, it will most likely be stained the exact same color as my coffee table. Because this has all happened before and will happen again, you know.

Moving on, though…

I’ve never been a fan of word-based wall art. I don’t know why, but I suspect that it has something to do with it rarely saying what I want it to tell me. The solution to this is, of course, to Fail It Yourself. So when a particular quote from a particular TV show pops into my head while I am simultaneously thinking about what to do with my displaced gray canvas, I toss my distaste for wordy wall stuff out the window. After all, writing is rewriting, and it’s time to revise this canvas (again).

So, I mobilize the materials that I have on hand. Paper, a printer, a razor, a brush, and paint. I already have many shades of paint from which to choose, and I probably decide to go with yellow because I haven’t used it for a second project yet.

I use Gimp to figure out how big I want my letters to be (and what font), then print out those letters in Word. Then I cut them out, and then I tape them together into one big stencil.

At this point, I should stop. I should go buy poster board, or vellum, and probably some spray adhesive, and actually make this, like, a legitimate stencil. But I don’t. I could say I’m impatient, and I could say I’m lazy. Either way, half-assing it is just how I roll.

So I paint with the yellow paint, and it’s a little sloppy, but I neaten it up before it dries and it’s not too bad. But I don’t love the color. It’s too much…yellow. It’s not enough…neon.

To Michaels! I finally make a new purchase to complete this project: neon acrylic paint. After tax, we’re talking $0.75, which is an awesome price because my change is perfectly shaped for the laundry machine.

When I get home, I notice how much bigger the tube of neon yellow paint is than the other tube of yellow paint. I inspect the other differences to find out why, and notice that the yellow paint is fabric paint. This would make sense, since I bought it to make my mother hand-painted dish towels for her birthday. Also, it’s clearly evident from the label. Since I’m literate and ostensibly can read labels, I probably shouldn’t make the same mistake twice. But I do. Ka is a wheel.

Anyway, I continue undeterred and paint over the fabric-paint yellow with the neon yellow. It takes four coats before I’m happy with the opacity of the neon. And then I rearrange the wire on the back, consult apartmenttherapy.com to remind myself how high to hang the thing (at least I’ve figured that out over the last two years), measure the wall, and find out that there’s already a hole from a previous picture-hanging project precisely where I want to hang it. Joy!

And with no further ado, the twice-revised canvas that just won’t quit…

image

Because a house is not a home until there’s a Deadwood quote on the wall. In neon yellow.

Getting a Wax

Originally posted March 14th, 2013

So the next thing one does after using Annie Sloan Chalk Paint is try out the Annie Sloan wax.

By the time my dresser is stripped and my paint is dry, I’m at work on a Monday, but I plan to wax my dresser after work. I have no experience with this, so while at work, I watch the online tutorial again. And then I’m like, oh crap. She says there’s no need to worry about mistakes with the dark wax as long as you used the clear wax first. And of course, Cheapskate McCornercutter didn’t buy the clear wax.

But seriously $30 for INVISIBLE wax???

So I’m like, no I’m drawing the line folks. If this was available at Home Depot, I might spend the dough. But I am NOT driving back to Agoura Hills. Additionally, store hours are probably such that I can’t make it back until next weekend and I’m sorry, but my sweaters and tank tops REALLY need to be in that new dresser, like ASAP.

So. To google we go! And what do you know, but tons of other FIY-ers (they call themselves DIY-ers, but I KNOW the fail it some of the time) have found substitutes for Annie Sloan products. Are they as user friendly? Are they as stylish? No, probably not. But one of these substitutes I learn about is one kind of clear wax for another kind of clear wax, so…

image

Minwax. $9.98 at Home Depot.

So I pick this up on the way home.
And upon my arrival at home, I scrape some of it out into a paper plate, mash it around until it’s a little warmed up, then get it on my cheap-o brush.

image

It’s a little crumbly, but whatever.

So I do just like in the video. I swirl it onto my dresser in small chunks. Then I take a cloth and buff it off. I do this until it is done.

Also, I listen to Watership Down on Audible. I highly recommend that you read it. You will have no idea how interesting talking bunnies are until you do.

Then I go straight into the dark wax by Annie Sloan. And let me tell you. It is MUCH softer than the Minwax.

image

SOFT wax. Make no mistake. But, can you see how the clear wax made the top all shiny? You can kinda see the reflection of the brush in the wax. That’s how I know it worked just fine.

And I smear the dark wax all around with the brush, then try to wipe it off with my rag. This is not that easy, but I started with a small area and just kind of tried to ease into it.

image

So here’s one side and one drawer done. I don’t think the results are so bad, right?

So after I smudge up the entire thing and buff it to a nice shine, I realize that I still have to find drawer pulls.

Drawer pulls seem like they should be cheap. They’re not. In the same antique market where I bought the paint, I wandered around trying to find crystal or glass knobs for cheap. I found them, but not for cheap. And hardware stores are not cheap either. I could find some cheap stuff online. But then I’d have to wait. And my sweaters and my tank tops just can’t do that. (Neither can I, as you know.)

I had happened across some at Michael’s randomly a few weeks before, so I go back to see if they’d work.

They turn out to be ok, and only cost $2 a piece. So. I buy eight. And of course I use my 40% off one item coupon and save a whopping $.80 off of a $16 purchase (before tax).

THEN I have to buy drill bits for my awesome drill, which I love, but have never used until now. And I sign up for some random Sears rewards program just so I can get these drill bits for $14 instead of $25.

image

Ooooooh. Pretty!

So I decide to put the holes for the pulls more or less where the old holes were, except now there’s only one instead of two. And I attach the pulls!

And here it is!

image

I’m going to say here that I love my color choices, I love the wax. I don’t love the pulls. They are going to have to be replaced someday.

Also. I should eventually learn how to take good photos. But that is like this whole other thing that I can’t even think about right now. So for the meantime…imagine this dresser as this awesome piece of furniture that you want so bad you’re willing to Fail It Yourself just to have it!

Then, start at square one. There’s a patient way…or an ambitious way. Curblist or Craigslist, people.

Sew On A Roll

Originally posted January 29th, 2013

So I’m just going to continue with the whole sofa thing. Since I’m logged in and all.

We are now up to January, by the way.

So, I finally get my sewing machine down from the closet shelf.

image

Now that I’m looking at it, I remember how cute it is.

I’ve already taken the old fabric off and taken the stitches out. So I spread it out on the fabric that is still left. How well did I plan this out, right? (So glad I ordered the extra yard.)

image

Now I get out my fabric pen and spend no less than an hour tracing and measuring and fretting. And I honestly don’t know how I got through this, or how I managed to finally take the scissors to it. It’s kind of like an ill-remembered fever dream. Anyway, I eventually cut.

image

And then I line up the pieces and sew them together. Less stress here. I bought a seam ripper, so I’m good for re-dos.

Also, regarding the seam ripper. I forgot to mention that the old fabric is basically stitched together like a big sack that goes over the back of the sofa. But when I try to take it off, it’s impossible to tug off. I have to use the seam ripper to take out the seam while the fabric is still on the furniture, or it’s never coming off. While doing this, I also realize that I’m never going to be able to make a sack, then get it onto the sofa. So I decide that I’m going to sew the side pieces to the front, then attach the back with tack strips. Which suits me fine, because I love smashing with my mallet. As you know.

Back to sewing! I sew, then look at my handiwork.

image

Way to go.

Nurse! Seam ripper, please.

Let’s try this again. Second time works much better, and I manage to avoid the same issue on the other side.

image

Seamless!

image

I forget to take a picture of the tack strip before I hammer it in. Also, I forget to take any pictures of the staples at the bottom. You understand, right? I mean, the sewing part is over, and the light was at the end of the tunnel. And I am running for it with tears streaming down my face, hands outstretched, drinking in the light and the air and the after photo.

image

My new living room sofa corner!

I failed it myself, folks. And succeeded.

Eventually.

Before and After – Patio Set

Originally posted October 1st, 2012
So I bought this patio set a couple years ago on Craigslist that needed to be as cheap as possible because I never really meant to keep it. For a while it was on a patio at my office. Then for a little while it was on the balcony at my boyfriend’s house. But now my boyfriend has moved, and I’ve got my patio set back. Great, right? Here’s the issue: this table and chairs are hideous.

When I bought this set, it was what I like to call “frog green.” But any frog this color would be radioactive, so that’s not accurate. I was leaf green. Grass green! Awful green! I decided that I’d keep the set if I could change the color. How about spray paint? Sure! Do I know how to use spray paint? No!

I call boyfriend, and I tell him that I’m going to spray paint the set. And he tells me that it’s not frog green, it’s sea green. I ignore him. I decide to pick up the patio set from his house after I go to Lowe’s. I got to Lowe’s. I buy drop cloths, and rags, and what I think is enough paint to cover the tables and chairs. And a face mask to keep the fumes out.

Then I go get the tables and chairs. And ok, so the boyfriend is right. Two years out in the sun and the top of the table and the seats of the chairs have faded to sea green. Pale turquoise! Green chalcedony! Lovely green! But the legs are still frog green. Luckily, the paint I bought is going to look great with chalcedony.

Step One: Scrub down the set. Note: the best product for a good scrubbing down is Dr.Bronner’s Castile Soap.

image

Step Two: When it’s dry, put the stuff you’re going to paint on a drop cloth. Then paint. It will be harder to press the button on the paint can than you imagined. It will be harder to get full coverage on a very narrow, round piece of metal than you thought. Oh well. Let your first coat dry, then do it again.

image

Step Three: Let everything dry for several hours, then reattach the table tops and chair seats with the original screws.

Step Four: Throw away the drop cloth and gasp in dismay about how very poorly the drop cloth protected your driveway.

image

Step Five: Scrub out your entire kitchen because you did not shut the wooden door when you painted and there’s a thin film of orange on EVERYTHING. Use plenty of Dr. Bronner’s soap.

Step Six: Consider ways to deal with the orange paint on your face. Consider Dr. Bronner’s. Go with makeup remover. Sigh with relief when it comes right off.

image

Step Seven: Chill out with your awesome patio set, and hope your landlord doesn’t notice that you painted the entire property orange.