Paint

Repurposing Pinvy

I’ve been spending a pinch more time on Pinterest these days. While I’m looking for inspiration, what I develop most of the time is image envy. Let’s call it Pinvy. Sometime my Pinvy is based on the object in the image, and sometimes (most of the time) it’s based on the composition and lighting in the photograph itself (because while I can craft a lot of crap, I can’t seem to capture my craftiness in an image that satisfies). One such envy-inducing image was a wavy, scalloped-looking planter for succulents. It made me think of a weird bowl made out of a melted record that I had sitting in a closet, and then the Pinvy turned into Pinspiration. Which is to say, I felt that I had the adequate skills and materials to copy something I saw.

I pulled this wacky record bowl out of the closet and rejoiced with the realization that it would make the perfect planter. Have you ever noticed that inexpensive planters never have a hole in them? And that trying to repurpose other things into planters is nearly impossible because they lack that drainage hole? That hole, that tiny absence of material is mysteriously worth extra money except for this one time I remembered I owned a melted record that could be used like a bowl.

So.

Step 1: Paint the record with leftover paint.

Step 2. Fill with dirt.

Step 3. Put succulents in dirt.

Step 4. Photograph (poorly).

Step 5. Photograph again (still poorly).

Step 6. Give up and post it anyway.

Weird record bowl

Weird record bowl

Repurposed planter

Repurposed planter

New Old Bed

Once the bedframe is bare, I start obsessing about paint. I even buy a third can of spray paint at Home Depot and stack it with the others. The third one is matte, as I decided I didn’t want to go metallic about ten minutes after buying the metallic colors. I also worry about how hard it’s going to be to spray paint the very narrow pieces of metal, and whether I’ll lay the bed on the ground to do this or put it together and paint it while it’s assembled. I go back and forth between brown and gray and matte and satin and spray and brush so many times that I start to lose my momentum and completely freak out.

I realize at this point that this project is unlike any I’ve ever done. It isn’t fail-safe. Not in the “cannot fail” sense, but in the “harmless fail” sense. Up to now, anything I’ve screwed up is either funny or fixable. But I’ve put so much time into this project, not just stripping it, but waiting for nearly ten years to do it, that failing now might break my heart.

I remind myself of a few things to get past this paralysis. First, nothing’s ever really not fail-safe. If I don’t like the color I choose, I can strip it again. Or, make like my lazy predecessors and paint over it. It won’t be the end of the world, no matter what happens. Second, if I take my time, choose carefully, don’t skip any steps, and basically pretend I’m a patient, careful, thorough individual, I could possibly get it right the first time. Third, call Dad for help on that second part.

I call my Dad, and he offers some advice. “I’d do it with a brush, even maybe an artist’s brush for the little parts. And first do one of the slats that no one will see. Take it in the house and make sure you like it in that light.”

I finally buy a can of actual metal paint in the darkest brown I can find as well as a can of primer and do as Dad says. I smear some brown paint on one of the slats, let it dry and take it in the house. It’s awful. I decide I won’t do brown. I consider this decision a major achievement. When I realize that this brings me back to gray, my original choice, I start to wonder. Should I have just gone with the chalk paint?

I only have to turn my head to see the graphite Annie Sloan chalk paint I used on my dresser and realize that that’s exactly what I want on my bedframe. I have no idea why I drove to Agoura Hills a month ago, looked at the sample in the store, and talked myself out of buying this paint. I had a sample right here. In the room where the bed would go. I want to slap myself. At the same, time, all the hemming and hawing and doubt has gotten me here, and I now know exactly what I want. So that’s something.

All this hemming and hawing and doubt has not returned me to Agoura Hills, however, which is stupidly far away. And also, that stuff is expensive. There must be an alternative.

I spend hours online looking at paint. There are all kinds of cheaper brands of chalk paint that you can buy at Home Depot—theoretically—but none of the local stores have them available. You have to order this stuff online and wait a week. Waiting is not in my skill set. Because waiting is not in my skill set, I don’t want to order a sample, wait a week, test it, decide I like it, order the rest, and wait another week. Millions of dollars are not in my bank account. Because my bank account lacks millions of dollars, I do not want to order a bunch of paint only to discover that I hate it. So.

I come to the decision late Sunday afternoon that I need to just suck it up and do the Annie Sloan. I know I’m going to like it, I know exactly how it will go on, how it will dry, what the wax will do to it. And I know I’ll like it. If this project is so important that it’s got to be right, it’s worth the $40 quart and hour’s drive (one way, ugh). Like really? It’s that far away to get this very popular paint? Really?

It occurs to me that it’s completely insane that the only place in Los Angeles county that sells a very popular craft paint (so popular that huge national home-improvement retailers are copying it) is only barely in LA county. It’s too bizarre. So I check Annie Sloan’s site. And since I did my dresser two years ago, a store in Atwater Village has started stocking it. Atwater Village is ten minutes away. Also this store closes in twelve minutes.

I tear over to Atwater Village and actually block someone’s driveway when I can’t find a legal parking spot, sprint to the store, and just barely get there before they close. I don’t get there, however, before the customer ahead of me buys the entire stock of Annie Sloan chalk paint in graphite. FIY is starting to feel like FML. But at least they’ll have more by Tuesday.

I decide to prime the bed in the intervening two days, even though this chalk paint isn’t supposed to need it. I do this because I don’t trust the company’s website, one, and two, because I want to do something while I wait, and three, because it’s supposed to rain before Tuesday. The primer will protect it, right? Sure.

It doesn’t rain, and the paint comes in on Tuesday. But rain is still in the forecast, so I don’t lose any time. I paint that sucker every spare second I have, even though the gray paint is almost the color of the clouds above us. But I don’t rush. I successfully pretend to be that patient, careful, thorough individual and let each coat dry completely. Then, I do the dark wax (I skip the clear wax because I’m completely sure I want the dark wax to be very opaque). I buff it up and bring that baby in the house on Friday night, just as the rain forecast drops to 0% for the foreseeable future.

On Saturday, it pours. I lie in my new old bed and listen to the rain.

Photo May 16, 9 30 59 AM

DSCF0326

DSCF0328

DSCF0343

DSCF0330

DSCF0331

“I Love Scraping Off Paint!” Said No One, Ever

The first (only?) piece of antique furniture I ever bought, and probably the only piece that is actually worth anything, I more or less bought by accident the year I moved to Austin. This was well before Fail It Yourself, and in fact well before I’d ever even used a staple gun. Basically, I have no idea who the woman was who bought this piece of furniture. She may have even believed she liked knitting. She was a very strange creature. Nevertheless, this woman was me, since I still own this item.

I was looking around Craigslist for a used mattress (grad students can’t be choosy, don’t judge) and found one for $200 that happened to come with an antique metal bed frame. That seemed pretty lucky, so I bought it. I slept on bed and mattress for two years, then needed to dispatch both so I could move to Los Angeles with my entire life packed into the trunk of a Korean subcompact.

But my mother wisely stopped me from selling the bed frame, saying she’d keep it in San Antonio. She thought I might one day want to refinish it. In January this year, I looked over my photographs from the past few years. It seemed clear that, since all my photographs were of the dog or literal, actual peeling paint, I should either get some new hobbies or think about refinishing the bed. I asked my parents how I might go about shipping that bed to myself with as little inconvenience or expense to them as possible and started researching costs and means. I asked for the bed’s measurements, and this is what I got in reply.

Mom's text caption: "El iron bed"

Mom’s text caption: “El iron bed”

My parents, paragons of inexhaustible generosity and energy, were ready for a road trip. Two weeks later, my bedframe was deposited into my apartment. My dad, after seeing how much paint was in the back of his car, exclaimed that just a little stripper would clean that baby right up.

Peeling

Peeling

What's under all that gunk, I wonder?

What’s under all that gunk, I wonder?

I must have had some premonition that this was going to be tougher than he thought, because I didn’t touch the thing for almost two months. But in late March, I determined that the time was right. I had a whole weekend clear to work on it, and figured that I’d get it stripped on Saturday, then painted on Sunday.

While I have no idea what I’m doing most of the time, you would think that I’d have peeled and applied enough paint by now to know that failing it myself rarely goes according to plan. Nevertheless, I was shocked, shocked that this project took five weekends to complete.

And here’s the tale of fail.

First, the prep work. After pinning lots of photos of other peoples’ stuff that I want my stuff to look like, I determine that I want to go with a dark color when I paint this thing. I’m thinking maybe very dark gray, or very dark brown, and I think maybe I want to do some chalk paint and wax action. So I head to Agoura Hills to look at the chalk paint. I decide that the gray is too light and bluish, even with the dark wax, and I don’t like the brown at all. And anyway, all the googling I’m doing about painting metal says to go with spray paint.

So I gather my materials at Home Depot and pick up a couple cans of metallic spray paint that I intend to test out. Then I head home and get to work.

First, I use the stripper I already have. If paint stripper could be organic, this stuff would be organic. It’s orange, low-odor, non-caustic, indoor-safe, and absolutely hopeless on whatever kryptonite-based paint is on this bed frame. I spend a day scraping away with this stuff, and my hand aches and my shoulder throbs, and I’ve taken off maybe six square inches of ancient, fossilized, sedimentary paint.

I go back to Home Depot and get the poisonous, noxious, chemical-based, burn-your-face-off paint stripper and try that. It’s a bit better, but whatever time I gain in paint-peeling efficiency I lose to skin-peeling prevention every time I run to the garden hose to rinse away the tiny drop that’s melting off my flesh. And yes, I’m wearing chemical-proof rubber gloves.

The biggest mystery about this whole thing is trying to understand why I should have to peel off someone else’s hideous mistakes. The layers of paint on this frame numbered no less than five (in some parts more) and included white, pink, metallic silver, metallic gold (on the decorative details), dark green, and aqua blue, in that order (top layer to bottom one). And where are the bozos who chose these colors now? And why isn’t this their problem?

Over and over I asked myself why none of this bed’s previous owners bothered to strip it before painting it. Finally, I scraped my way down to the answer: Scraping paint is a miserable chore that no one anywhere ever wants to do.

I mean, who paints a bed frame this color?

I mean, who paints a bed frame this color?

So why do I do it? I guess because I’ve thought about making this bed look as nice as it should for nearly a decade and can’t bear to let that dream die. And, I suppose, because I know I won’t be happy unless I do this one project right.

Also, I want to know what those decorative bits look like without the paint, and I am rewarded for my work when I discover that they are brass and pretty much as awesome as I could have imagined.

So, after four weekends of scraping and a couple of chemical burns, I get all the paint off this thing while listening to Nick Offerman’s Paddle Your Own Canoe, Neal Stephenson’s Snow Crash, Thomas Hardy’s Far From the Madding Crowd, and Zac Bissonette’s The Great Beanie Baby Bubble. (Not all of them in their entirety, silly; I did other things during these weeks that included book-listening. This project felt fifty hours long, but it wasn’t) I also think there was some of Stephen King’s Dark Tower series in there somewhere, but I can’t be sure. It’s all kind of a fume-induced blur.

The bare bedframe.

The bare bedframe.

I was thrilled when it was done—but then I realized that the hard part was still to come. I had decisions to make, and nothing increases my ability to fail it myself quite like a decision.

Rewriting on the Wall

Originally posted June 14th, 2014

Remember this Fail It Yourself?

image

When I painted this canvas blue, it was the first time I’d ever bought a canvas, brushes, or paint. I’ve bought paint a few more times since, including spray paint, which I swore before buying this canvas that I’d never use again (a vow that I have broken time after time). Once, I bought gray spray paint to refresh a lamp that I bought at Goodwill, and one evening, for no particular reason, I decided to paint this canvas gray with the leftover spray paint. Then I wound some twine around it and stuck some paper leaves on the twine.

image

It looked like this.

I don’t remember when I did this, and I don’t remember how long it stayed. I never really loved it. It eventually came down, and I replaced it with some frames that I spray painted black (with paint left over from this project). At this point, I’m a pro at finding new uses for old paint, and it’s a wonder that I ever buy anything at all. You have no idea how many things in this house are the exact same color blue as my dresser. And when I finally refinish my craigslist-purchased campaign desk, it will most likely be stained the exact same color as my coffee table. Because this has all happened before and will happen again, you know.

Moving on, though…

I’ve never been a fan of word-based wall art. I don’t know why, but I suspect that it has something to do with it rarely saying what I want it to tell me. The solution to this is, of course, to Fail It Yourself. So when a particular quote from a particular TV show pops into my head while I am simultaneously thinking about what to do with my displaced gray canvas, I toss my distaste for wordy wall stuff out the window. After all, writing is rewriting, and it’s time to revise this canvas (again).

So, I mobilize the materials that I have on hand. Paper, a printer, a razor, a brush, and paint. I already have many shades of paint from which to choose, and I probably decide to go with yellow because I haven’t used it for a second project yet.

I use Gimp to figure out how big I want my letters to be (and what font), then print out those letters in Word. Then I cut them out, and then I tape them together into one big stencil.

At this point, I should stop. I should go buy poster board, or vellum, and probably some spray adhesive, and actually make this, like, a legitimate stencil. But I don’t. I could say I’m impatient, and I could say I’m lazy. Either way, half-assing it is just how I roll.

So I paint with the yellow paint, and it’s a little sloppy, but I neaten it up before it dries and it’s not too bad. But I don’t love the color. It’s too much…yellow. It’s not enough…neon.

To Michaels! I finally make a new purchase to complete this project: neon acrylic paint. After tax, we’re talking $0.75, which is an awesome price because my change is perfectly shaped for the laundry machine.

When I get home, I notice how much bigger the tube of neon yellow paint is than the other tube of yellow paint. I inspect the other differences to find out why, and notice that the yellow paint is fabric paint. This would make sense, since I bought it to make my mother hand-painted dish towels for her birthday. Also, it’s clearly evident from the label. Since I’m literate and ostensibly can read labels, I probably shouldn’t make the same mistake twice. But I do. Ka is a wheel.

Anyway, I continue undeterred and paint over the fabric-paint yellow with the neon yellow. It takes four coats before I’m happy with the opacity of the neon. And then I rearrange the wire on the back, consult apartmenttherapy.com to remind myself how high to hang the thing (at least I’ve figured that out over the last two years), measure the wall, and find out that there’s already a hole from a previous picture-hanging project precisely where I want to hang it. Joy!

And with no further ado, the twice-revised canvas that just won’t quit…

image

Because a house is not a home until there’s a Deadwood quote on the wall. In neon yellow.

Off the Coast

Originally posted May 21st, 2014

I’ve wanted to paint on dishes for a couple of months now, but every time I look into it, I can only find paint that can’t come into contact with food. What’s the point of that? But whatevs. I decide that I’m going to make coasters for my coffee table, and I’m going to paint ceramics to do it. I go to Michaels and find blank ceramic squares, a roll of cork with adhesive backing, and, of course, paint.

Michael’s has a whole section of enamel paint, and I pick out a navy blue color and read the directions on the back. It says something about putting it in the oven to cure, which is totally cool, and while I’m reading this I also notice a really hot turquoise on the shelf and pick that up too. I also find a honeycomb rubber stamp and pick that up because I’m obsessed with bees and stamps. Also, I saw this tutorial online that shows you how to paint the enamel paint onto the stamp, then stamp the ceramic, so picking out a stamp was my plan all along. Because I can’t paint. I guess I forgot to mention that.

I am super excited to get started on this project as soon as I get home. I should probably wait and do it another day because I have to bake these things after I paint them, and it’s already 10pm, but I don’t wait. I start with the turquoise.

And I cannot get the paint to stick to the ceramic tiles. It sticks to the rubber stamp like, well, I don’t know, like I painted it onto the rubber stamp. The stamp sticks to the ceramic like glue every time, and then leaves almost no paint behind. I turn off my ceiling fan, thinking that it’s drying too fast. I work as quickly as I can, desperate to get a turquoise honeycomb pattern onto a square of ceramic, any square of ceramic! But I cannot. I end up with a couple of tiles that sort of have a shadow of the pattern on them, so I try to freehand the honeycomb cells a little bit. I am not very successful with this. Because I cannot paint.

So I switch to stripes, and I do a few stripes with the turquoise, and I decide to throw a navy stripe in there all sassy and diagonal-like. This is where I discover that the navy paint is totally unlike the turquoise paint. It’s much thinner and slicker, and it takes several coats to get my diagonal stripe to cover the turquoise stripes.

This gets me thinking: Maybe the navy paint will work on the stamp? I try the navy with the honeycomb stamp, and I am relatively successful with this. Relative success is marked by the fact that I’m not moaning, “why, why, why,” every time I peel the stamp off a ceramic tile and am only muttering, “whatever,” instead.

image

I pick out maybe seven of these things that don’t anger me too completely and decide that I’m going to throw away the rest. Then, I grab the closest tube of paint to remind myself of the rules for the whole oven part.

This tube of paint says nothing about curing it in the oven.

image

This tube of paint is not enamel paint.

And there you go.

So now it’s 2am and I’m practically weeping, but whatever. I put the navy ones in the oven and just let the turquoise ones air dry.

image

Getting a Wax

Originally posted March 14th, 2013

So the next thing one does after using Annie Sloan Chalk Paint is try out the Annie Sloan wax.

By the time my dresser is stripped and my paint is dry, I’m at work on a Monday, but I plan to wax my dresser after work. I have no experience with this, so while at work, I watch the online tutorial again. And then I’m like, oh crap. She says there’s no need to worry about mistakes with the dark wax as long as you used the clear wax first. And of course, Cheapskate McCornercutter didn’t buy the clear wax.

But seriously $30 for INVISIBLE wax???

So I’m like, no I’m drawing the line folks. If this was available at Home Depot, I might spend the dough. But I am NOT driving back to Agoura Hills. Additionally, store hours are probably such that I can’t make it back until next weekend and I’m sorry, but my sweaters and tank tops REALLY need to be in that new dresser, like ASAP.

So. To google we go! And what do you know, but tons of other FIY-ers (they call themselves DIY-ers, but I KNOW the fail it some of the time) have found substitutes for Annie Sloan products. Are they as user friendly? Are they as stylish? No, probably not. But one of these substitutes I learn about is one kind of clear wax for another kind of clear wax, so…

image

Minwax. $9.98 at Home Depot.

So I pick this up on the way home.
And upon my arrival at home, I scrape some of it out into a paper plate, mash it around until it’s a little warmed up, then get it on my cheap-o brush.

image

It’s a little crumbly, but whatever.

So I do just like in the video. I swirl it onto my dresser in small chunks. Then I take a cloth and buff it off. I do this until it is done.

Also, I listen to Watership Down on Audible. I highly recommend that you read it. You will have no idea how interesting talking bunnies are until you do.

Then I go straight into the dark wax by Annie Sloan. And let me tell you. It is MUCH softer than the Minwax.

image

SOFT wax. Make no mistake. But, can you see how the clear wax made the top all shiny? You can kinda see the reflection of the brush in the wax. That’s how I know it worked just fine.

And I smear the dark wax all around with the brush, then try to wipe it off with my rag. This is not that easy, but I started with a small area and just kind of tried to ease into it.

image

So here’s one side and one drawer done. I don’t think the results are so bad, right?

So after I smudge up the entire thing and buff it to a nice shine, I realize that I still have to find drawer pulls.

Drawer pulls seem like they should be cheap. They’re not. In the same antique market where I bought the paint, I wandered around trying to find crystal or glass knobs for cheap. I found them, but not for cheap. And hardware stores are not cheap either. I could find some cheap stuff online. But then I’d have to wait. And my sweaters and my tank tops just can’t do that. (Neither can I, as you know.)

I had happened across some at Michael’s randomly a few weeks before, so I go back to see if they’d work.

They turn out to be ok, and only cost $2 a piece. So. I buy eight. And of course I use my 40% off one item coupon and save a whopping $.80 off of a $16 purchase (before tax).

THEN I have to buy drill bits for my awesome drill, which I love, but have never used until now. And I sign up for some random Sears rewards program just so I can get these drill bits for $14 instead of $25.

image

Ooooooh. Pretty!

So I decide to put the holes for the pulls more or less where the old holes were, except now there’s only one instead of two. And I attach the pulls!

And here it is!

image

I’m going to say here that I love my color choices, I love the wax. I don’t love the pulls. They are going to have to be replaced someday.

Also. I should eventually learn how to take good photos. But that is like this whole other thing that I can’t even think about right now. So for the meantime…imagine this dresser as this awesome piece of furniture that you want so bad you’re willing to Fail It Yourself just to have it!

Then, start at square one. There’s a patient way…or an ambitious way. Curblist or Craigslist, people.

Dresser Dressing

Originally posted March 3rd, 2013

image

So the wood looks really great, and I’m super pumped about that. EXCEPT that the top of the dresser is a little weird. Someone once upon a time attached the piece of wood to the top that was not finished on the sides, then painted those rough edges. They basically acted like a sponge and soaked up all this paint. Also, they are rough and ugly. This is disappointing.

So I think about it for, like, a second. I decide that since the top is kinda funky, I’m not going to stain the dresser. I’m going to paint it. Also, I’ve been wanting to use this Annie Sloan Chalk Paint stuff that I’ve read so much about.

Lots of people who paint furniture like this stuff, and I’ve seen it on the Internet, so I’m like, yeah, I’ll do that. I check out her website and realize that I probably didn’t need to strip the dresser at all if I was just going to paint it, because she says her paint is formulated to just go over anything without sanding or priming.

So I feel like a dummy, but also I don’t. I now know how to strip furniture, and that’s worth something, right?

Also now the dresser is ready for that wood filler. There are tons of gouges and stuff, especially in that problematic top piece, so I spend a little while filling in cracks and the drill holes from the original handles.

image

That is a gouge, right?

image

Goodbye gouge!

image

So while this dries I’m going to go get some paint. But a little more looking around on this Chalk Paint website and I realize that this stuff isn’t available at Home Depot. The closest location is in Agoura Hills.

So I’m like, oh, ok. That’s about 45 minutes away with no traffic. Which is kind of far for paint. But I’ve sort of decided that I have to have it. So I drive to Agoura Hills.

I drive to Agoura Hills where there’s this little cluster of antique shops and I find the stall in the shop where this stuff is sold and HOLY CRAP IS IT EXPENSIVE, OR WHAT? $40 for a quart? Seriously? And then the wax you have to buy to go with it is another $30, like for real?

But at this point, I’ve already made the drive. So I have no choice.
I buy a quart of Chalk Paint in Provence, and then a sample size of Graphite. And I buy a can of the dark wax. It comes to nearly $90. Remember how I said failing it yourself is not thrifty? Yeah. Still true.

So then I go home with my ridiculous paint, and the wood filler is dry and all ready to go. So I sand the thing down a little with my cordless sander. Because yes, I actually own power tools!!

And so I get to painting and I get most of the thing done before it gets dark. But not all of it. And I’m not patient. So I just go get my headlamp and keep going. Also, what did I ever do without a headlamp? It’s the best thing ever!

image

I even break out my tiny paint brush and do the detaily bits where the top meets the body of the dresser.

And this time it stays outside to dry overnight. And I only wake up five times to make sure it’s not raining because I’m only a little crazy.

Genius Costume Purse

Originally posted November 4th, 2012

This Halloween needed to be cheap. I mean really cheap.

I spend a couple hours shopping my closet, until I find a costume I can do without having to buy a thing: Rosie the Riveter.

220px-RosieTheRiveter

rosie

This is the ACTUAL Rosie The Riveter, painted by Norman Rockwell. Evidently, the other poster is an imposter. Not that it matters. The only reason I am pointing out this image is the lunchbox. I mean, check out Rosie’s lunchbox. It is AWESOME.

So much for a free costume, because I have to have that lunchbox.

Last year at a Halloween party I saw this woman dressed as a beer wench with a BEER STEIN PURSE. As soon as I saw it, I recognized that incorporating a purse into your costume is a sure mark of real genius.

beer stein purse

I look around online and find all kinds of actual vintage lunchboxes that cost way too much and have to be shipped, but I’m not deterred.

I visit Michaels thinking I can find some wacky lunchbox in their aisles, but no. They don’t carry any. I swear, that store has tons of wacky stuff and never the wacky stuff that I’ve got to have.

Lucky for me, there’s a Party City next door to Michaels, and for some bizarre reason they actually have this mini lunchbox in with the girly birthday party stuff. And it’s like $10.

image

So here I run into a dilemma. I swore the last time I used spray paint that I’d never do it again. But I feel like, aesthetically, I need spray paint here. I don’t know why. And I’m not really sure what aesthetically means. But mostly, I just need to do this paint job PDQ.

Also. Last time wasn’t a total disaster.

So I go to Do It Center and choose a matte black spray paint for a couple bucks.

So I get home and it’s dark out and really windy, but I decide I’m going to do this anyway because I hear time’s winged chariot rumbling down the 101, i.e. I have a costume party tomorrow.

BUT I don’t repeat my mistakes, and I spread out the ENTIRE drop cloth this time. And I shut both the wooden door and the security door. (I am still cleaning orange dust off my shelves and fan blades up in here and we do not need to add matte black to this problem.)

image

Also, I decide that I don’t want the buckles to be black, so I take a minute to pry those off with my teeny tiny screwdriver set. It’s pretty easy, actually. So far, so good.

So I strap on my mask and my headlamp and go to town.

image

Am I overdoing it, do you think?

image

BEST. PHOTO. EVER.

So actually painting this stuff takes about 30 seconds. And I do a couple coats. And I sort of mostly let it dry before I try putting the buckles back on and get a huge thumbprint right in the front. Oh well. The party is tomorrow, ok?

And then I paint Rosie’s name on the lunchbox, both for historical accuracy and costume clarification.

image

Tada!

So this is pretty successful, right? No paint on my face, in my house, or on my driveway.

And I’ve got a Genius Costume Purse that I’ve always wanted. And it was almost free.

Hooray for me!

learning

Blank

Originally posted October 7th, 2012

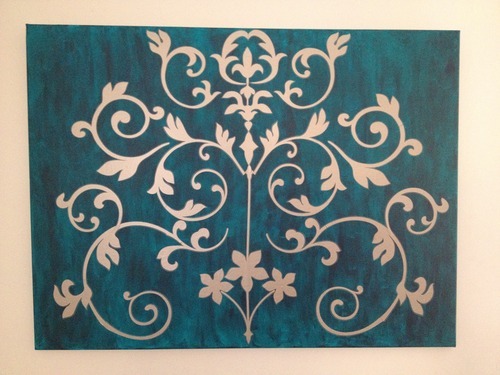
So I’ll just jump to the chase here. This is what I’ve been up to with my paints and canvases and stickers.

I sent this photo to my sister and she told me I can’t blog about this project because it’s awesome. She is wrong. I mean—she’s right, it’s awesome. But that doesn’t mean I can’t blog about it on Fail It Yourself.

Reason 1: I messed up plenty of times.

Reason 2: It’s not about failing, it’s about trying something out even when failing is a real possibility.

And there is no reason at all this project could not have been a catastrophe.

You might have noticed that I like to say I have no idea what I’m doing. But really. I had no idea what I was doing on this one. I am intimidated by Crayola watercolors on printer paper. I had never in my life purchased a canvas, a paintbrush, or tubes of paint. EVER.

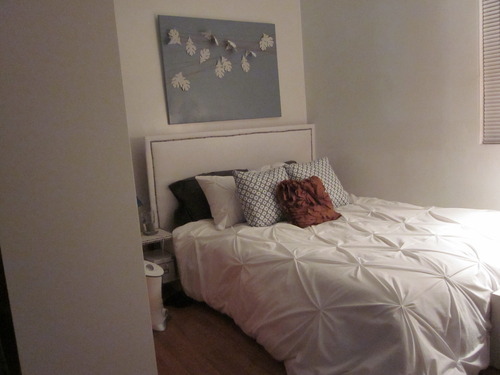
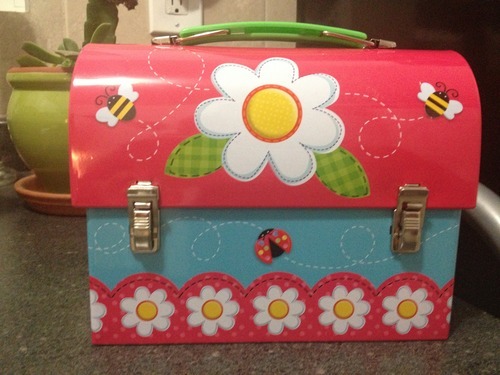
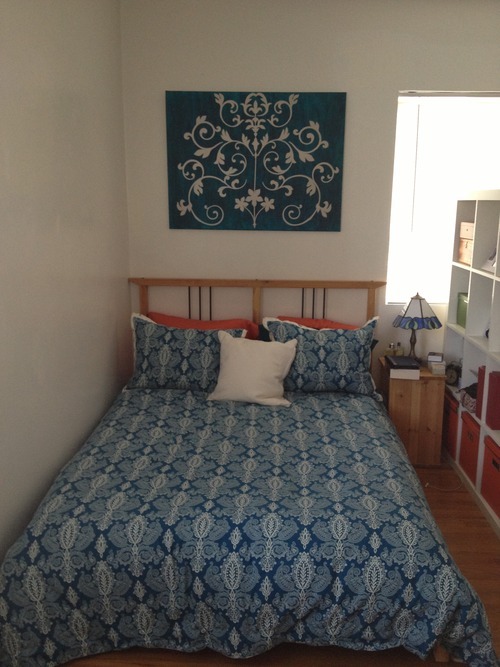
But I have this horrible blank wall over my bed.  And real art that is unique costs lots of money. I decided I would do something on a canvas, but I stopped short of actually trying to paint “real art”  and bought the stickers.

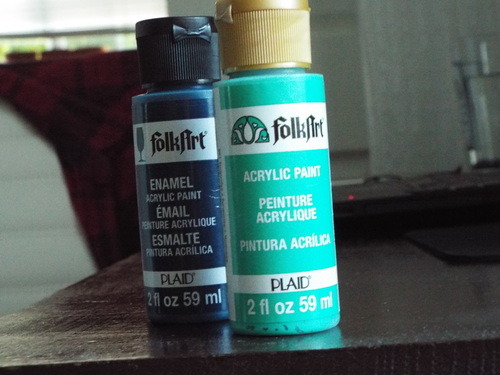
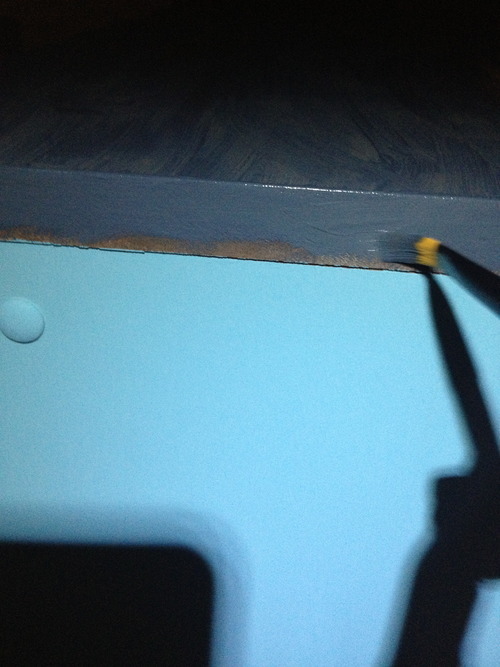
So. I bought the cheapest acrylics from Michaels in pthalo blue and pthalo green because their names were similar and I supposed they would likely blend together well. I also bought the biggest canvas that I could get off a shelf without asking for help.

I went home, spread out some newspaper, mixed up some paint in a paper plate, started painting, and tried really really hard not to think about it too much. This is the only way I could have gone about it. If I’d looked at that blank canvas too long it would have petrified me.

image

image

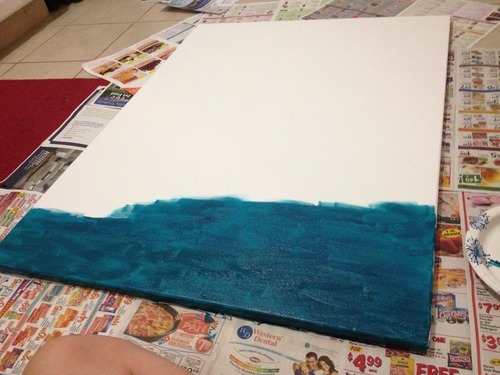
When I got to the end of the canvas, I stopped painting, and that was that.

I couldn’t believe how easy this was. I loved the color I mixed up, and I liked the way the paint wasn’t entirely opaque on the canvas, and I had it done in an hour.

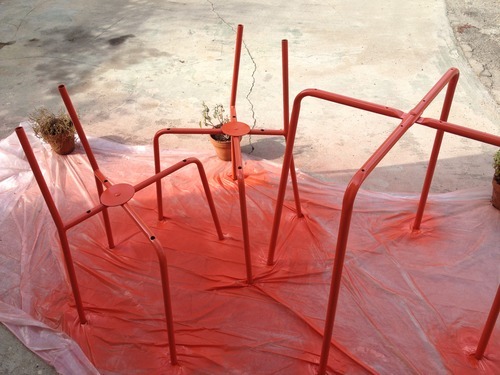
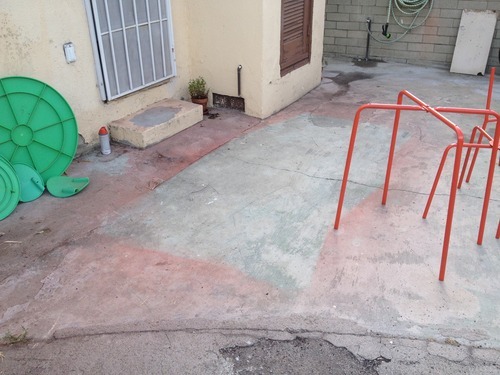
Tip to self: NEVER use spray paint again. Brushes, even small ones, are 1000% easier.

Okay, so then I realized something. This sticker set comes all cut up in pieces and you’re supposed to stick it to the wall in your own sort of design. I had planned to copy the design on the box, because that would be easiest. But I kinda forgot to find out what the dimensions would be for that design before I bought the canvas.

OOPS.

My canvas was too narrow to do the design on the box. So I had to come up with my own design. Okay, don’t panic. The sticker comes in 14 pieces so that shouldn’t be too bad, right?

NOPE.

Each of those 14 pieces breaks up into other little pieces. There are no less than 30 separate stickers in that kit.

So, I taped off a fake canvas on a chunk of wall and figured out my design. I started with a “spine” for the damask and then plugged in all the other little curly bits one by one.

image

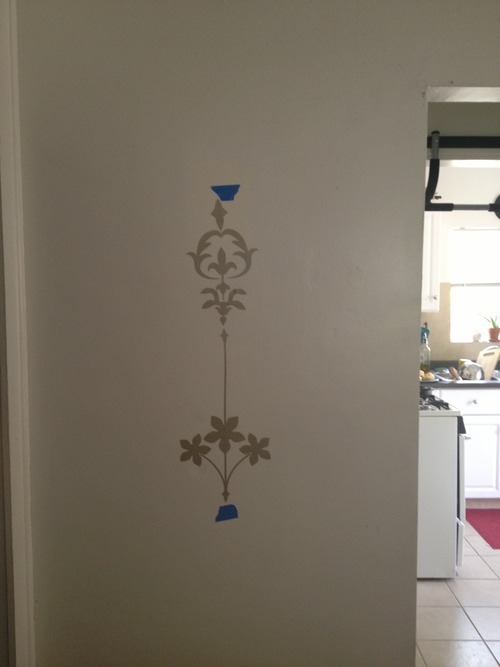
The packaging and website for these stickers claim that they are “easy to apply.” What they mean is: “it will not be hard on the vinyl or the adhesive to apply, remove, and reapply each of these 30 pieces 30,000 times while you are getting your act together. Whether or not this is hard on you is not our problem.”

image

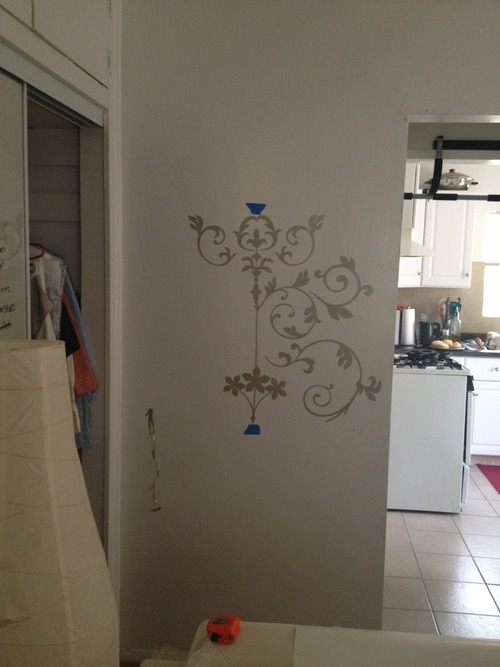
Okay, so this process took HOURS but I kept at it until I felt like I had a pretty good design. Then, I took a picture of it on the wall. This was a clutch move, because as I transferred the stickers to the canvas I had to refer to the photo about 30 times.

image

It is really hard to position these right. It really is. I mean, they are all curvy and weird and the slightest angle or shift just…ok anyway. The point is, I totally thought I was cheating by using stickers and it turns out the stickers were the hardest part BY FAR.

This experience reminded me a lot of working on some of the window displays at J. Crew. The designs were handed down to us by corporate, along with a lot of the supplies. The best projects were the ones where they would tell you EXACTLY what to do. “Hang the Christmas lights 8.5 inches from the top of the window. Copy the picture we’ve provided.” The worst was when they’d send you some materials and try to say something like, “be creative, make it your own!” When a company that insists on searching your bag for stolen merchandise before you can leave its store suddenly tells you that your creativity is valuable and your decisions have power, it’s absolutely impossible not to suspect a trap.

Anyway, this project reminded me of that because these stickers showed up in the mail and there was a picture that was kind of helpful, but ultimately I had to be creative and make it my own. It felt a little like a trap, but I tried to ignore the feeling.

It turned out to be ok in the end. I like my design and I’m pretty glad I had the flexibility to do my own thing.

So I am done with the front of the canvas. Then I realize I have no way to hang the thing.

Back to Michaels.

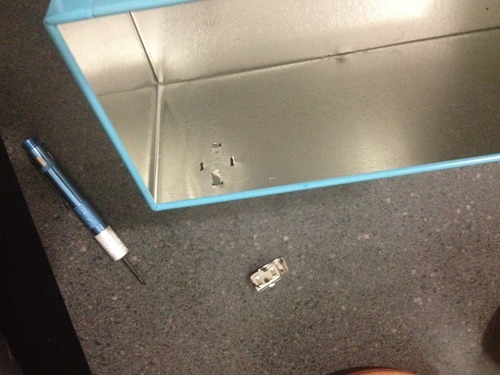
I bought a little wire hanging kit and watched this video to show me what to do with it.

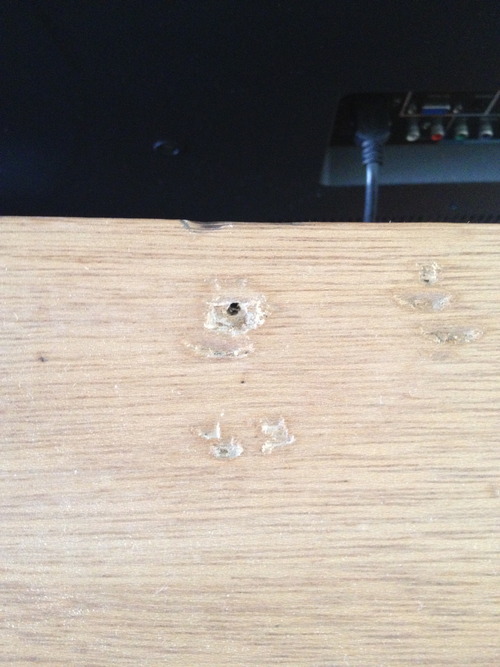
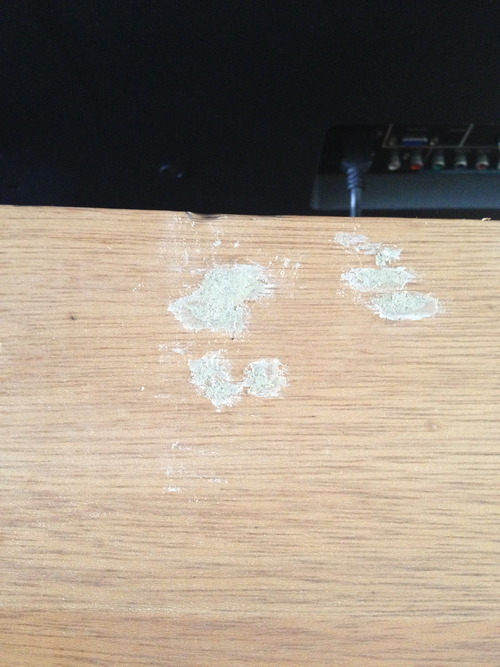
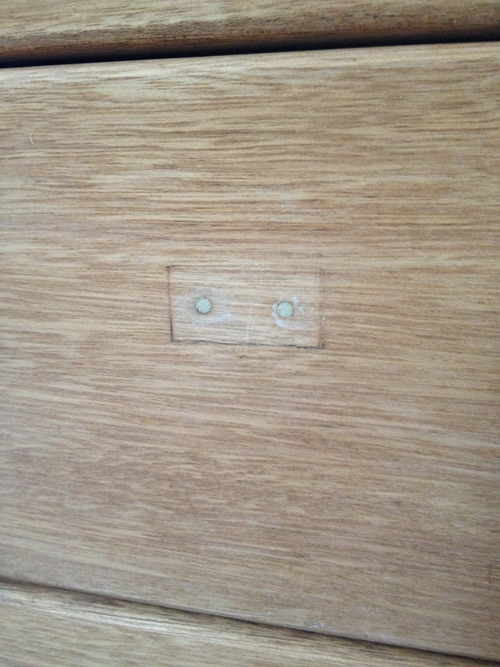
The directions on the back of the kit said to place the grommets 1/3 of the way from the top of the frame. So I measured the width of my canvas, divided that by a third, then measured down from the top and placed my first grommet.

Weird thing is, it looks like a lot more than 1/3 of the way down. It’s almost half! And that’s when I realized that I had measured 1/3 of the width of the canvas, not 1/3 of the height. So I’m an idiot.

Luckily, the fact that there is an extra hole in the back of my frame where I placed – and then removed – the first grommet doesn’t really change the result.

Then, I had to measure where on the wall I wanted it to go.

Here’s the thing with hanging pictures. I know how to use a measuring tape and put the picture right where I want it. But, and this is the kind of thing that drives me insane, how do I know if where I think it should go is really the best place to put it?

There must be some kind of rule, a golden rectangle thing that the Greek mathematicians figured out eons ago and that I am just too lazy to discover. No, really. I didn’t even google it. I just hung the sucker up! Because I have no idea what I’m doing.

Anyway, here it is.

image

As a writer, I’m never afraid of a blank page, because if you don’t like it blank all you have to do is write all over it. YOU HAVE ALL THE POWER OVER THE BLANK. I guess the same thing goes for walls. And canvases.

So now what do I do about the blank wall next to my bed?????

Before and After – Patio Set

Originally posted October 1st, 2012
So I bought this patio set a couple years ago on Craigslist that needed to be as cheap as possible because I never really meant to keep it. For a while it was on a patio at my office. Then for a little while it was on the balcony at my boyfriend’s house. But now my boyfriend has moved, and I’ve got my patio set back. Great, right? Here’s the issue: this table and chairs are hideous.

When I bought this set, it was what I like to call “frog green.” But any frog this color would be radioactive, so that’s not accurate. I was leaf green. Grass green! Awful green! I decided that I’d keep the set if I could change the color. How about spray paint? Sure! Do I know how to use spray paint? No!

I call boyfriend, and I tell him that I’m going to spray paint the set. And he tells me that it’s not frog green, it’s sea green. I ignore him. I decide to pick up the patio set from his house after I go to Lowe’s. I got to Lowe’s. I buy drop cloths, and rags, and what I think is enough paint to cover the tables and chairs. And a face mask to keep the fumes out.

Then I go get the tables and chairs. And ok, so the boyfriend is right. Two years out in the sun and the top of the table and the seats of the chairs have faded to sea green. Pale turquoise! Green chalcedony! Lovely green! But the legs are still frog green. Luckily, the paint I bought is going to look great with chalcedony.

Step One: Scrub down the set. Note: the best product for a good scrubbing down is Dr.Bronner’s Castile Soap.

image

Step Two: When it’s dry, put the stuff you’re going to paint on a drop cloth. Then paint. It will be harder to press the button on the paint can than you imagined. It will be harder to get full coverage on a very narrow, round piece of metal than you thought. Oh well. Let your first coat dry, then do it again.

image

Step Three: Let everything dry for several hours, then reattach the table tops and chair seats with the original screws.

Step Four: Throw away the drop cloth and gasp in dismay about how very poorly the drop cloth protected your driveway.

image

Step Five: Scrub out your entire kitchen because you did not shut the wooden door when you painted and there’s a thin film of orange on EVERYTHING. Use plenty of Dr. Bronner’s soap.

Step Six: Consider ways to deal with the orange paint on your face. Consider Dr. Bronner’s. Go with makeup remover. Sigh with relief when it comes right off.

image

Step Seven: Chill out with your awesome patio set, and hope your landlord doesn’t notice that you painted the entire property orange.